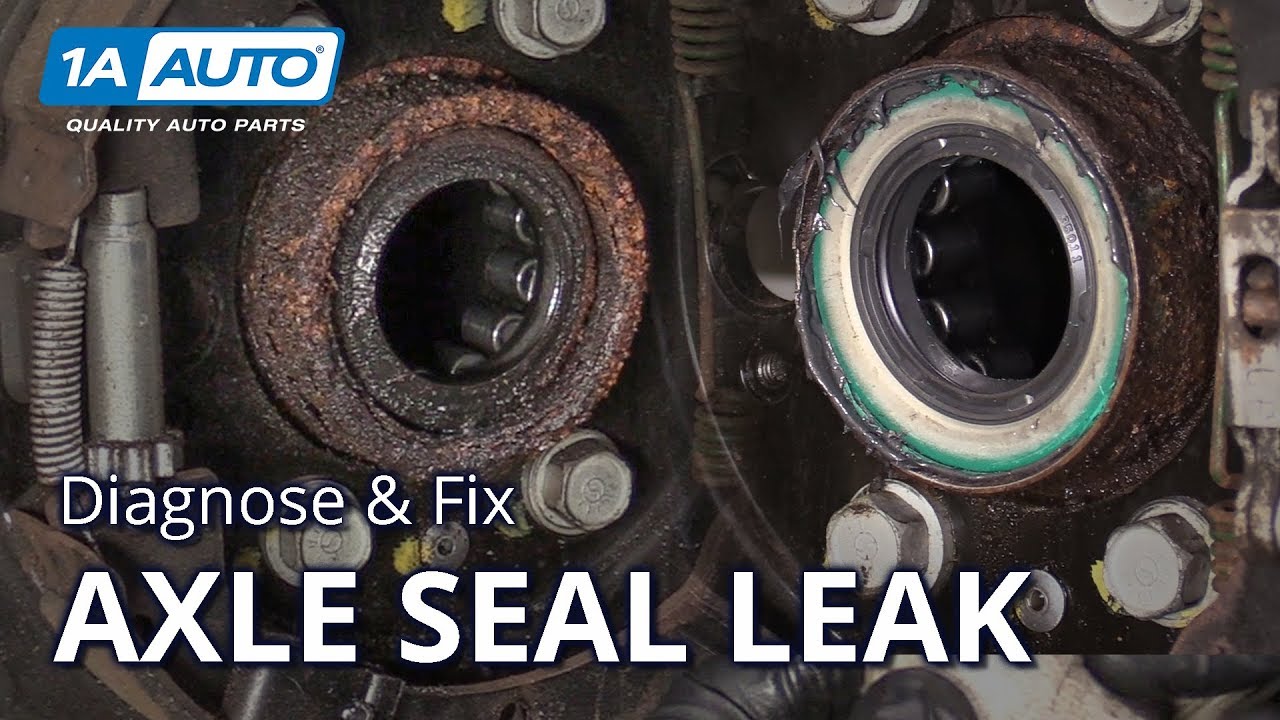
Oily Puddle Near Wheels Diagnose Axle Seal Leaks on Your Truck or Car
Created on: 2020-03-16
Check out this video if your vehicle has an axle seal leak. Len shows you what you can do!
Hey, friends. It's Len here from 1A Auto. Today I've got a vehicle up on the lift, we've got the rear differential here and I want to show you something that you might look for if you want to tell if you have an axle seal leak. Generally speaking, you're gonna see moisture along the backing plate. If it's worse than that, you might even see it down along the road or making its way down which would have contaminated your brakes, but we could talk about that later. So with that said, let's delve into it and maybe give you a look on what it takes to fix it.
Hey, friends. While I've got your attention, make sure you leave a comment, like, subscribe, ring that bell. Let's get back to what you came here to see. First thing, make sure you're on level ground, chock your wheels and put your vehicle in neutral, remove your diff plug. Tiny bit of penetrant. Fluid may come out, make sure you have a collection bucket. All right, obviously nothing came out, fluid's low probably from the leak. Remove your lug nuts and wheel. Remove your brakes.
Now that that's, off we have a clear view behind the axle. And I can see the top of that tube and it's definitely full of moisture. I'm gonna follow it down along the bottom, I can see moisture. Something that's very important to pay attention to if you do have an axle seal leak, you need to make sure that there's none of the axle fluid on your e-brake shoes, if there is, you have to replace your e-brake shoes and I would recommend the hardware at the same time.
Next, we're gonna remove our differential cover mounting bolts. Make sure you have a nice catch pan. Pry this away. Remove the pan. So next thing we need to pay attention to is this little bolt right there. In this application, it's an 8-millimeter. Remove that. Now we're gonna spin this a little further, try to get this at an angle so hopefully this pin will want to slide down through. Set this aside. Let's turn this a little further, paying attention to our gears to make sure nothing is moving around too much. That looks good.
Now you need to be careful at this point, once you have the pin out you can't be turning those axles, you turn the axle that's gonna spin this right here which is gonna make these gears right here just kind of spin off and potentially fall out in which case you'll have to have it retimed and it's a big pain in the butt. Remove this bolt for the ABS sensor if it's in the way. Let's just push in on this axle now. Can see the little horseshoe there, we're gonna remove that horseshoe.
Now with a rag, we'll have to carefully slide this out of here. Nice. Here's our axle seal. Roll up a rag, stuff it in this hole and now clean up the area. There's several ways of removing your seal, you can use the seal puller, a pry bar or even if you had to in a pinch you could use your old axle. I'm not gonna deal with the axle because I don't want to damage it, I'm gonna go with a pry bar. And I'm using the pry bar because it's something that most people have and some people don't have a seal puller. When I use the pry bar, I'm gonna go right along this rubber lip and just along to that metal lip, right inside there. Once I do, I'm going to apply leverage. Sometimes you can bump them right there. Now we're at the point where you need to clean up your surface area. If you look where you removed the seal you might see a little bit of gasket still on there, make sure this is nice and clean.
Generally speaking, if you're replacing a seal it's a good idea to replace the bearings. In case you're not planning on it now is a great time to take a peek at them and make sure they're not scored or damaged. Clean down the area, install the seal. Make sure to wipe down this area on the axle, that's where the seal rides, and of course if you have any debris on your ABS ring. Install your axle. Let's get our little horseshoe clip in there.
Clean your pin and inspect it for damage. Install the pin with the holes facing there. Hold that so it can't fall down. Grab your locking bolt, put some blue thread locker. Tighten this bolt. Torque this to manufacturer's specifications. Never use one of these, only use one of these. Clean this area. Beautiful. Now you need to make sure that you clean your pan. Generally speaking, you should have a gasket that needs to be removed. After that, clean up any debris that's on here. Whether you're using the correct seal or just a little bit of gasket maker, you need to make sure that this is clean and dry. Sorry.
Put back on your diff cover. Bottom out your bolts. Make sure you torque these to manufacturer's specifications. Now we're going to put the rotor back on after you've cleaned up the mating surfaces. Reinstall your caliper and torque them to manufacturer specifications. Put your wheel back on. Make sure you put back in your ABS sensor. Add your manufacturer specified gear oil.
Man: Thanks for watching. Visit 1aauto.com for quality auto parts shipped to your door, the place for DIY auto repair. And if you enjoyed this video, please click the subscribe button.

How to Replace Front Passenger CV Axle 2011-14 Hyundai Sonata
New CV Axle Shaft from 1AAuto.com. How to replace the front passenger CV Axle on the 11-14 Hyundai Sonata.

